Saturday, September 24, 2011

Life's been good to me so far!

Thank you, Joe Walsh. ;)

Well, life for me is generally pretty darned good, but this month, I won me some goodies!

The first is this book "Cooking for the Birds" that I got from winning a haiku contest offered by WildBird magazine ( @WBeditor ) on Twitter.
This other set of goodies is actually for ds#1 who is the main birder in our family. The nice people at Audubon Guides (@AudubonGuidesfound out that my 15 year old is an avid birder and sent a package for him, no strings attached! I have to say I did buy their birding App, but it was on sale for a great price and I was going to buy it anyway.
Their Mushroom App is on sale right now for half price, so you budding mycologists should get yours now.

Speaking of getting freebies, a friend gave me a large bag of grapes, so I got to make some jam. YES!  Thanks bunches, Carol!  ;)
After making jam, I painted my front door, after having serious red-front-door envy (thanks for nothing, Amber and Sherrie).
I experienced a moment of panic when I realized that it was middle of September and I hadn't started chemistry labs for my older son yet. Thanks to Meg's materials, I had no problem getting going on them. I decided that because ds#1 doesn't have anyone to do labs with this year, ds#2 can do them with him. Ds#2 would be in grade 8 if he were in public school, while ds#1 would be in grade 10.  However, doing the labs together reminds me of just how far apart they are sometimes. While ds#2 works pretty much at grade level, ds#1 works at the level of at least a sophomore undergraduate, if not as far up as senior. This is lab 2; the colors aren't food coloring or markers. They were all chemical reactions:
This little guy made me smile. It was hanging out outside our bedroom window. Duude, you're not camouflaged with our screen. I can see you! Silly stick insect.
And because Suzanne asked about them, I have to share photos of the mixing bowls I inherited from my MIL:
The one on the far right is the yellow Pyrex dish I use for pretty much everything. The one on the far left is a blue Pyrex bowl in the same set. Here's a close-up (pardon the gunk on it...I had butter and shortening in it just before I took the photo) :
Alas, I don't have another bowl in the set...but I would be totally happy to receive one as a gift!  ;)

Another thing that makes me happy is when a dessert works out. However, even when it doesn't work out, it still makes a decent breakfast. This Coconut Banana Cake was just so-so.  I think if I'd used all cake flour like the recipe asked and also used a fresh coconut, it would have been pretty darned good. Man, I haven't had a fresh coconut in forever.  I miss living in the tropics sometimes.
If you want to try making this yourself, here's the recipe, from The New Good Housekeeping Cookbook:

Lemon curd filling - homemade or store-bought
2.25 C cake flour
1 C sugar (I always halve the amount)
3/4 C shortening
1/3 C milk
2.5 t baking powder
1 t vanilla extract
1/2 t salt
1/2 t baking soda
2 eggs
1 C mashed ripe banana (about 2 bananas)
1 Coconut (about 2 pounds) or 1 7oz pkg flaked coconut

1. Preheat oven to 350F. Grease and flour 2 9" round cake pans.  Into large bowl, measure flour and next 9 ingredients. With mixer at low speed, beat ingredients just until blended. Increase speed to medium; beat 2 minutes, occasionally scraping bowl.

2. Pour batter into pans. Bake 25-30 minutes, until toothpick inserted in center of cake comes out clean.  Cool in pans on rack 10 minutes; remove from pans and cool completely.

3. While cake is cooking, prepare and shred enough coconut to make 2.5 cups shredded coconut. Wrap shredded coconut in plastic wrap and refrigerate (along with remaining coconut).

4. In small bowl, with mixer at medium speak, beat heavy cream until stiff peaks form.

5. On plate, place 1 cake layer, rounded side down; evenly spread with lemon-curd filling. Top with second layer, rounded side-up, lightly pressing cake onto filling.  Frost side and top of cake with whipped cream; pat shredded coconut into cream. Refrigerate cake.

"I may not have gone where I intended to go, but I think I have ended up where I needed to be." ~ Douglas Adams

Tuesday, September 13, 2011

The deepest cut

I swear I don't like the new Blogger interface...but maybe I'm just being old and crotchety. Nah...couldn't be me.

Once when we were at the Farmer's Market and I was buying a chicken from Schacht Farm, I asked Mandy about the chicken parts they offered, and she confided in me that many people don't know how to cut up a whole chicken.  I found that hard to believe, but then again, my mom had never taught me how to cut up a chicken either.

In fact, you know who taught me how to cut up a chicken?  Alton Brown. Yup, thanks to the Fry Hard II: The Chicken episode (Season 4; episode 45) of Good Eats and the excellent dino-cam, I am now some sort of chicken-cutting expert (by "expert" I mean I've not lost a finger or sent myself to the hospital for stitches yet).

So, the BEST way I can think of for you to learn how to cut up chicken is to get your hands on that Good Eats episode and watch it. If you can't, then the second best way is to read that episode chapter in Brown's book "Good Eats: The Early Years".

The third best way is to read this post.

If you're still reading, then I'll assume you either really like me, or had to settle for third best.  Either way, I guess I have some 'splaining to do.

We bought a chicken from our local health-food co-op because we ate all of our last batch and our next batch won't be ready for butchering until late November.  This was on sale, and since the date was fine, hubby got it.
Here it lies, all rinsed and ready for a cutting lesson.  I was sorely disappointed that they don't include innards. I do love me some fried heart and gizzard.
What I do first is cut off the wings. You can either cut off the tip, middle, than drummette or cut off all three together and then separate them.  I used to love to eat the tips, but now save them for making stock.  The key is easily cutting off the parts is to learn some anatomy and know where the ball-joints are.  Cutting through those is a lot easier than trying to cut through bone.

That leads me to another point (no pun intended) - the best knife is a sharpened knife.  Alton Brown also has a Good Eats episode on sharpening/honing one's knives.  You must watch it.  As he, and other chefs have, said: dull knives make accidents.

So here I am down to the drummette:
Next, I cut off the drumsticks from the carcass, and I also cut the meat off the drumsticks themselves because that's another chicken-cutting truism: bones make the best broth. My kids have never understood the allure of eating a drumstick anyway, but even if they did, I'd have to deprive them of these delicacies at home because broth is more important than the fleeting gastronomic happiness of my children.
Here are the drumstick bones in the bowl of the slow-cooker, along with the wing tips:
And here are the good pieces of meat in a container ready to be marinated before frying.  You may notice I didn't try to strip the wings of their bones. This is for several reasons: 1) I don't trust myself to do fine surgery with kitchen knives on slippery meat, and 2) the amount of time it'd take for me to de-bone these pieces would be much better spent on wasting away on Facebook or felting belly button lint.
Next, I tackle the breasts: feel for the breastbone and cut slowly and carefully along one side of it using small strokes. Keep peeling back the meat as you cut.
Repeat on the other side of the breast.  Because I want "finger"-sized pieces for frying, I cut up the breast into several smaller pieces.
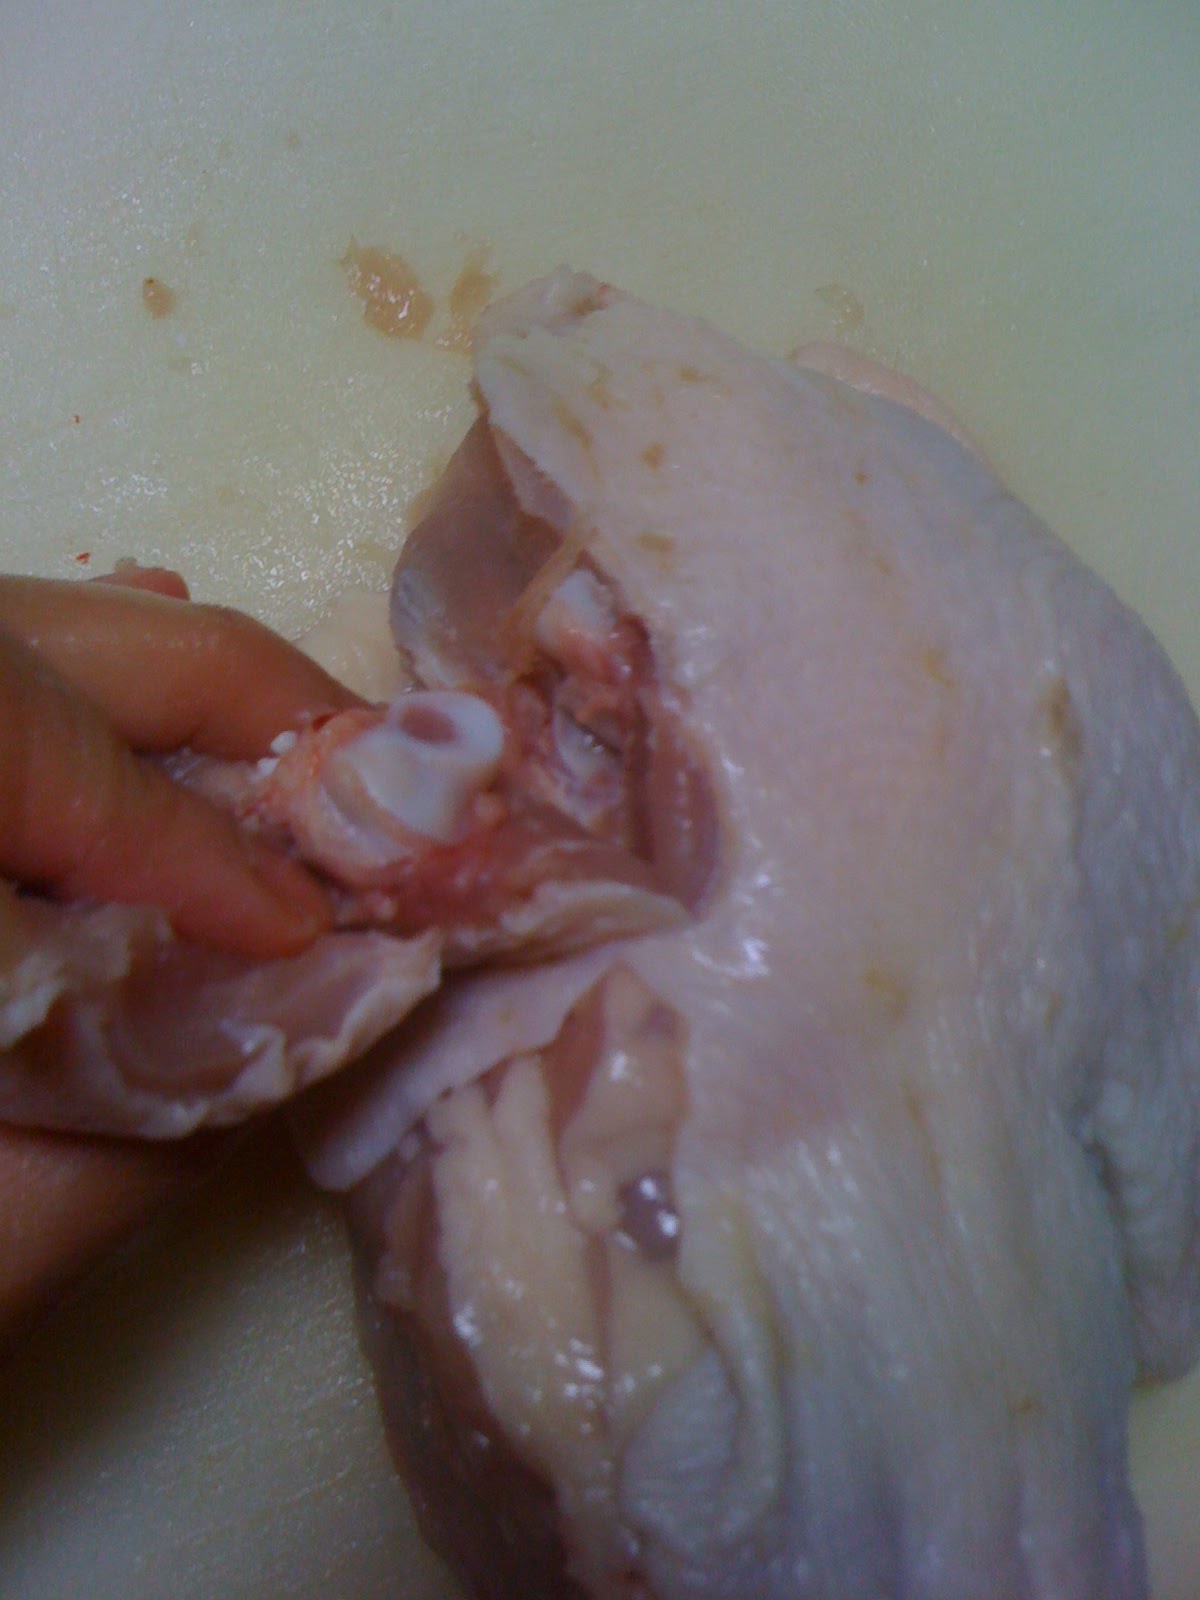
The only remaining chunks of meat are the thighs.  Thighs are much hardr to cut off since it's not as easy to find their joints.  But, feel around for it; it's worth the time to find it to cut through.
Here's a different view of the joint:
Now, this...this is the part we all fight over. No, not really; I try to sneak off with it when Scott's done frying the chicken.  ;)  This is what Alton calls the "oyster" of the chicken.  Best dang little piece of dark meat on the bird.
Another view of the "oyster":
By now, the bird is pretty much picked:
So I toss the carcass into the slow-cooker bowl with the other bones:
This is hubby's favorite seasoning, so I put it into the bowl and fill it with enough water to cover most of the carcass:
I use the same seasoning on the pieces of meat to be fried:
Then I add buttermilk into the pan of meat:
I mix it up so everything will be coated and seasoned and let it sit for a few hours.  Before frying, hubby dredges the pieces in flour.
...and was rewarded by hubby's stellar fried chicken, mashed potatoes & gravy, and green beans:
As for the broth, after cooking for many hours in the slow-cooker, we strained out the bones, picking off the last of the meat and saving it, and then used the broth to make chicken congee.  Nothing gets wasted.

Unfortunately, the chicken was not nearly as flavorful as the ones we butcher ourselves. We've not found any chickens for sale that are as tasty as our own.  But, fried chicken is fried chicken, and still pretty darned yummy!

"I may not have gone where I intended to go, but I think I have ended up where I needed to be." ~ Douglas Adams

Monday, September 05, 2011

This blog has lasted longer than some marriages!

That's kinda sad about the marriages, but pretty amazing about my blog.

Apparently, my first post on this particular blog was made back in March of 2006. Despite the many times I've wanted to stop blogging and have a real life, I've kept on keeping on...and here I am.

Some people keep track of their number of posts; me, I can't even keep track of my kids' names or ages. I'd like to say I've got better things to do, but the truth is that my memory has left me for a much younger woman. Now that IS sad.

Speaking of sad, here are a few photos of the devastation crows and raccoons left in their wake.  They destroyed the corn: (hm...this actually looks like a photo of pre-devastation...whatever...)

They destroyed the musk melons:
They destroyed the yellow watermelons:
They had left the Moon & Stars watermelons for a few days longer, but have since eaten them too.
It's enough to make a grown gardener cry.  Yet hubby bravely plows on, (no pun intended; he doesn't plow) sowing seeds to start lettuce and beets and more:
I guess you can't be a gardener if you aren't optimistic.  So I'll leave you with a fun quote about the optimist by Oscar Wilde, "Between the optimist and the pessimist, the difference is droll.
The optimist sees the doughnut; the pessimist the hole!"

Mmmmm....doughnuts....

Next time: how to cut up a whole chicken!

"I may not have gone where I intended to go, but I think I have ended up where I needed to be." ~ Douglas Adams